First, I finished the pockets by sewing together the two pieces.
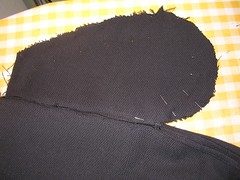
Then I sewed the bodice to the skirt according to the instructions, making deep pleats as I went. When the top and bottom were sewed together, in places I had nine layers of fabric - where the bodice sides overlapped (3 each) and met the pocket and the skirt (3 more). The cotton fabric frayed quite a bit and so did the lining (as usual), and I really didn’t want a messy finish on the inside so I decided the trim the cotton layers and fold the thin lining seam allowance over all the raw edges.
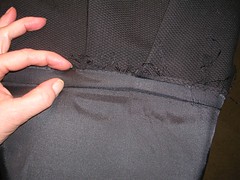
I could see as I trimmed that I should have made the lining seam allowance deeper than the rest to give me more to work with. Next time! I may add a 1/4 inch to the lining at the bottom or I may just sew a 3/4 inch seam, as the jumper is plenty long enough to allow for this manoeuver. However, before I did anything, of course I ironed the waist from all angles. First I ironed open the seam allowance. Then I ironed all the seam allowances down toward the skirt, from the inside and the outside. Then I decided I would topstitch on the outside, using a zipper foot, very close to the seam. This would force the seam allowances down and make them flat and prepare for the finishing on the inside.
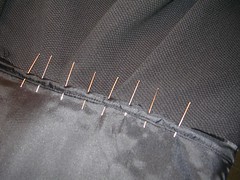
Once I was done the row of stitching on the outside, I turned the garment inside out and started working the lining into a tiny fold over top of the trimmed cotton seam allowance. I didn’t press it (it is on the inside after all and it will get pressed later from the outside) and I used pins to hold the fold down so I could sew over it.
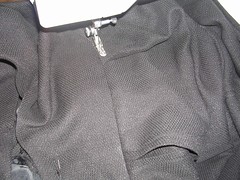
Even though it is usually better to topstitch from the right side, I had to sew from the wrong side to make sure I caught the edge of the folded lining.
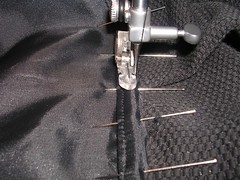
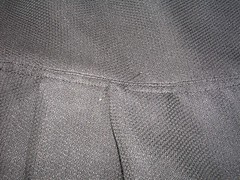
Sure enough, when I was done, I looked at the right side and I had caught one of the pleats up in the stitching. I used my seam ripper to cut the stitch that held the pleat up in the wrong position and smoothed the pleat down to where it belonged. The I sewed a few stitches from the right side to complete this part of the second line of topstitching.
I stuck a pin in the pleat to remind me which one it was. You can see from the next photo that the two lines of stitching are not perfectly straight but considering the fabric, I think it is pretty good and I also don’t think it will show much once I am wearing the garment. Also, I can always sew some trim over top of the stitching if it ends up bothering me.
Finally, I machine sewed a narrow hem, sewed on the buttons at the side (I made buttonholes according to the instructions but I am sure these buttons are purely decorative and I will be able to pull the whole thing over my head to put it on). As “Anonymous” remarked in the last project, the final photo is so dark, you can’t see much of anything (except on the right, the button catches a tiny bit of the flash). I will get Peter to take a picture of me wearing it whenever I do wear it and post that later.

For my next project, I am going to try to choose something a little brighter!
No comments:
Post a Comment