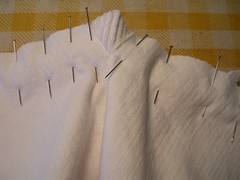
First, I attached the back yoke to the back body of the jacket. The only tricky thing there was to get the points right. The pieces are “V” shaped but the points get sewed to each other facing the opposite way. This means you have to clip the interior “V” on the back so you can spread it out to accommodate the “V” of the yoke. In the photo, you are looking at the wrong side of the jacket back pinned to the yoke underneath it. I have clipped the jacket back piece to the small dot which I marked in blue chalk. You have to work with the excess fabric on the jacket back piece but once you are sewing up to the dot at the point, you just leave the needle down in the fabric, lift the presser foot and rotate the piece slightly so you are lined up for the second half and then continue sewing. Once you turn it over and press the seam allowances up, it looks perfect.
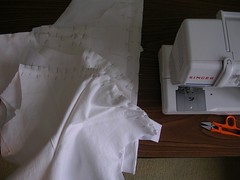
I like this next photo because I took the macro setting off the camera and stood back and used available light. It is just all the pieces I have pinned together, piled up and waiting for the next big “sewing in batches”. [“Batches? We don’t need no stinkin’ batches!”]
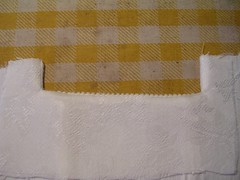
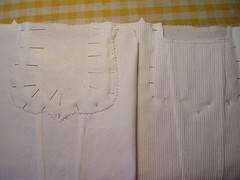
Next: pockets. These front pockets look cool but they really aren’t that difficult if you just follow the directions. Of course, I don’t exactly follow them because I finish all the raw edges to avoid fraying after washing and there is no mention of any of that. The “pocket bag” is the shaped piece that goes on the inside of the jacket. You don’t see it and so I made it out of the damask. I pinked the edge and then I zigzagged it just to be sure. Anyway, the next photo is about the pocket facing which finishes off the interior edge of the pocket. I also used the damask and finished its edges (after I had sewed the piece on and ironed it on the right side after turning it and realizing I had not pinked or zigzagged it). The photo shows the pocket facing from the inside or wrong side, after I have turned it and ironed it.
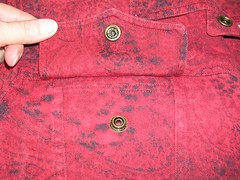
The next comment comes before you sew on the pockets flaps. I have already decided to use snaps for fastenings and therefore, what follows doesn’t apply this time. However, I have also made this jacket using buttons as fasteners and I realized after the first one that it is MUCH easier to make the buttonholes before you sew the flaps on. I use a Singer with an automatic buttonholer and it doesn’t work at all well with layers of fabric sandwiched in between its metal parts. The next photo shows a jacket I have already made (using snaps, sorry) and it shows where the fasteners go on the pocket (the buttonhole would be in the flap itself and the button would be sewed to the pocket). Imagine trying to squeeze that pocket flap into a buttonholer the way it looks there.
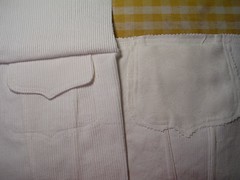
Next, I show the pocket bags pinned on, from the inside and the outside. I’m going to sew around the contour of the pocket bag from the inside to make sure I get the shape right and sew two lines of stitching which makes a decorative pattern on the right side of the jacket. I can do this because the thread tension on both upper and bobbin threads on my machine works and the stitching is nice and even. I also use a slightly longer stitch so it shows. However, I am not using contrasting thread because I don’t have that much confidence in my ability to make perfect lines of stitching. I know, they don’t have to be perfect. But for a white jacket, I’m using white thread! Maybe some day I will use contrasting thread.
Finally, I have attached the pocket flaps and the yoke for the front and sewed them all together. This photo shows the fronts from the wrong and right sides. I have trimmed the seam with pinking shears AND zigzagged the raw edge. I have made this jacket before and washed it too and I know this seam frays. It gets covered up by the front facings but you can still peek underneath and see at the fraying and that just makes me crazy so I finish the edges.
No comments:
Post a Comment