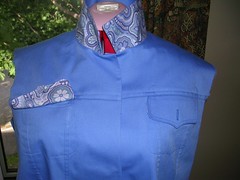
Friday, June 29, 2007

Seersucker shirt

I've gone from this:
man's shirt
... to this today:
man's shirt
I used to have such a mental block about collars and even though I've been sewing the band facings on by machine for a long time, I still get that "I don't want to do the next step" feeling when it comes to collars. Never mind - they are easy now.
man's shirt
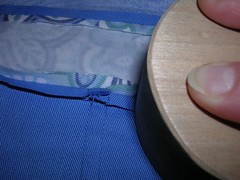
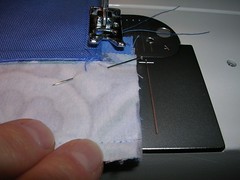
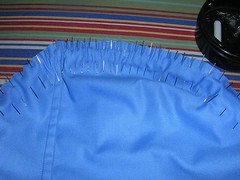
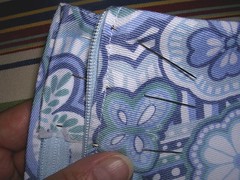
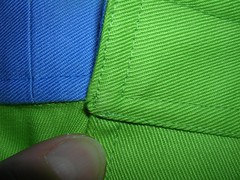
First I sew the collar band to the WRONG side of the body of the shirt. Then I fold up the edge of the facing and pin it carefully over the stitching line I just made on the RIGHT side of the shirt.
man's shirt
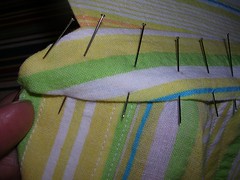
Here's a close-up of one end of the collar band as pinned. It's a little loose looking but once I get it under the sewing machine needle and the needle stuck through all layers to hold it down, I can tweak it a tiny bit here and there and then sew it down.
man's shirt
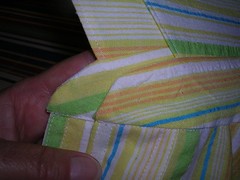
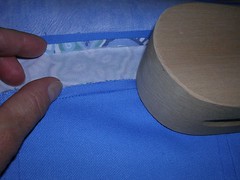
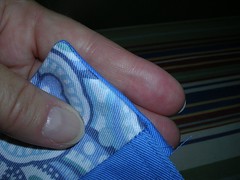
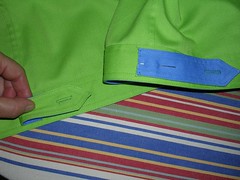
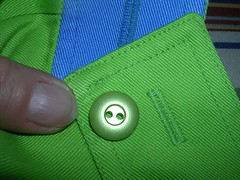
Here is the finished collar band. In the front is the INSIDE of the band and the collar band end behind the other one shows what the band looks like on the outside. You might have to go to Flickr and see them large to get the detail. What I like about this method is that the band never comes apart as it sometimes did with hand stitching. Plus it's nice and tight and flat and if you want, you can put on more rows of topstitching.
man's shirt
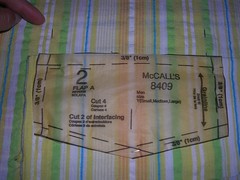
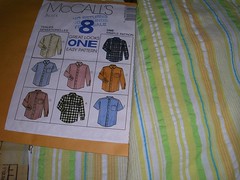
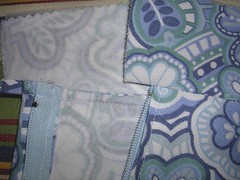
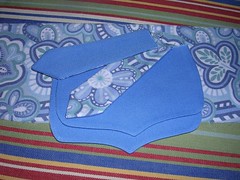
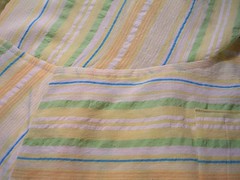
It's so easy to match pocket stripes. Just make marks where the pocket is supposed to go on the shirt (I am pointing to a small pink chalk mark in this photo). Then get a piece of fabric where the stripes line up with the shirt (making sure it is slightly larger than the pocket area). Pin the pocket piece on to the piece of matching fabric, making sure the stitching lines match up and then cut it out. As it turns out, I didn't put a flap on this pocket but the pocket itself was done the same way.
man's shirt
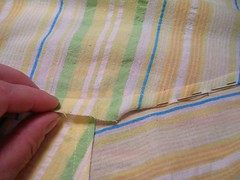
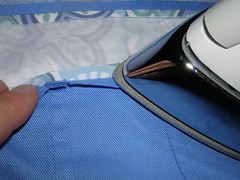
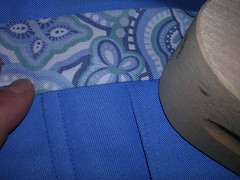
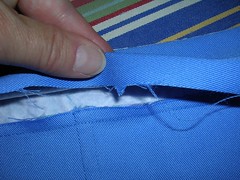
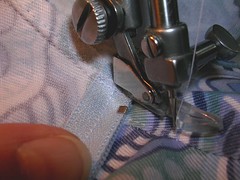
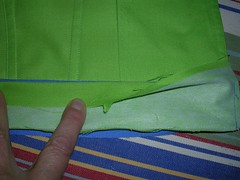
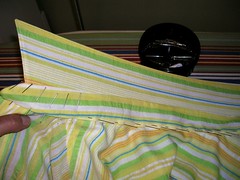
Here's another look at a sleeve flat fell. You can also sort of tell here that this seersucker is quite thin and soft compared to that other one I made that was stiff - and still is after several washings. Anyway, I sewed the sleeve on and then trimmed the part of the seam allowance that belonged to the body of the shirt, allowing me to fold over the seam allowance that belongs to the sleeve. Of course, you have to iron the seam allowances toward the body of the shirt first.
man's shirt
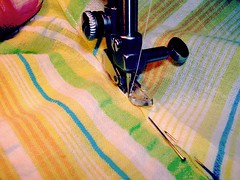
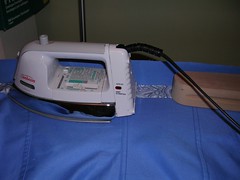
Then I just run along the fold with the zipper foot, taking the pins out as I go.
man's shirt
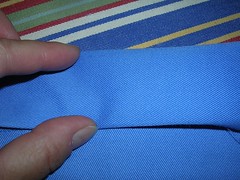
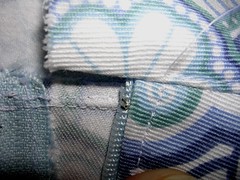
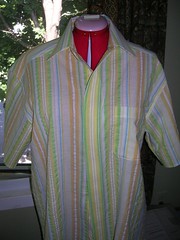
From the right side of the shirt, you can see it makes a nice finish. And you can see the topstitching where I finished the yoke. Almost done.

Musings

I like browsing through The Sartorialist, a blog of sorts about fashion, mostly on the streets. I don't agree with all his picks but I do like the fact that he chooses all sorts of folks to use as examples of fashion. And I get ideas from looking at other peoples' choices, like the one I noticed yesterday. It's the first entry at the June 27, 2007 spot and shows a woman in a high-waisted skirt. If I can get it to fit (and not ride up or dig in), I will be making one of these sorts of skirts soon. I like the way the skirt makes her seems taller too.

In the meanwhile, I have also decided to finally make a suit from the beautiful navy wool I got from Darrell Thomas a couple of years ago now. I have been having a discouraging run of job hunting lately and maybe if I have the most beautiful and conservative suit to wear to interviews, I will feel better about the whole thing. I was also inspired to think about my DT fabric because of the newsletter which I still get even though I haven't shopped there in too long and an entry in it which referred me to another Ottawa blog where the entry was about sewing a dress with DT fabric.

For right now, it's back to the seersucker shirt which is about 1/3 made and hanging on my dummy, who I am still not convinced is named "Rose".

Wednesday, June 27, 2007

Blue jacket finished

So much to do, so little time.
blue jacket
The blue jacket is complete and has been worn twice! I love it and the green one and now I want to make five more the same way. Too bad - there are other things that need doing more.
shades of blue
I wore the jacket to a BBQ on the weekend, where it was actually cool enough to do so. Here, I am heading to teach my second last class and I'm taking the jacket because the college is air-conditioned and thank goodness because in the photo, it is 33C (91F) out there. I found the little turquoise top with all my other sleeveless tops and discovered it went with the skirt so I put it on, on top of a plain white t-shirt.
blue outfit
I wanted the full effect of the jacket with the skirt so I put it on in spite of the 40C humidex. "Quick! Take the picture!"
new shirt
Next - Peter needs a cool cotton seersucker cycling shirt. It may be hot, but we're still "out there" (maybe in more ways than one).

Thursday, June 14, 2007

The Clapper

clapper
Here's what a clapper looks like. It's a nice hardwood of some kind and very smooth. It doesn't weigh that much - less than an iron anyway. I have seen other conformations in photos but never used any one other than this one.
first press
The only "trick" to a clapper is in when you use it. First you press the area that you want to be really flat. I am using the blue jacket I currently still have not finished as the demo. Make sure your iron is warm enough for the fabric and preferably using steam. There could be some delicate fabrics that won't take much heat or any steam but I'm not sure you'd want to use a clapper on them anyway.
clapper use
As soon as you remove the iron from the pressed fabric, place the clapper on the hot fabric and press. You can rub the clapper along the fabric or pat it, or, if the fabric is heavy cotton, pound it. The idea is to get the clapper to absorb the heat and steam and sort of force it back into the fabric. I'm not sure exactly how it works, but you do end up with really flat fabric after using the clapper.
second press
This demo uses the jean jacket because of all the bands and things on it. On the bottom band, I sew the patterned fabric (the inside of the band) to the WRONG side of the jacket. Then I fold it up and attach the folded edge to the OUTSIDE or right side of the jacket. In order to make the seams flat, I first press them open, regardless of whether they will stay open. In this photo, I am pressing both seam allowances into the band area, after I have pressed them open.
third press
Then I turn the garment over and press the seam on the finished side (which in this spot is the WRONG side of the jacket body). This is effectively the third time I have pressed this seam. Since it will be the final press in this spot before I do the top stitching, I also use the clapper.
iron/clapper train
As I go along pressing a seam, I make a little train out of the iron and the clapper, first pressing with heat and steam and following with the clapper to make it good and flat. With this twill fabric, I just run the clapper along the seam. But if I get to areas that won't stay flat, I won't hesitate to pound on them with the clapper.
bottom band corner
Then I make the bottom band ends by sewing right sides together, folding the band along the seam where I have joined the print to the plain fabric.
bottom band corner
Once I turn the corner right side out and poke the point of the corner out with a point turner, I can iron the end flat too. In this photo, I have not ironed it yet.
initial fold
Finally, I have to see how much seam allowance I have to turn under, when I get ready to sew the folded edge of the band to the jacket with topstitching, on the RIGHT side of the jacket body.
checking fold size
First I fold the seam allowance under so it just covers the stitching line where I first attached the band. Then I pull it away to see that I DO have about 5/8ths of an inch and so I will trim about half of that away before I pin the fold down and topstitch it.

Tuesday, June 12, 2007

A Sleeve

June 12
I've got hung up with a job interview (full time teaching instead of just part time - the interview went well as far as I am concerned but you never know with these things) and gearing up to work at the Habitat for Humanity "Women Build" here near Ottawa. I had to take a safety course in preventing falls last night but it was fun and I learned a lot. Tomorrow I have to show up at the site at 7 in the morning, complete with steel-toed-full-steel-shank boots and a tool belt. I'm ready! Too bad I have to take two buses to get there. In the meanwhile, my sewing languishes.
the million pin sleeve set
I promised a reader a clapper tutorial and will write it up tomorrow (after working construction for the day!) but in the meantime, here is a photo of how I set the sleeves in on most garments. I rarely baste and prefer instead to use as many pins as I can possibly stick in the fabric.

In the other meantime, we are ordering a tandem to celebrate out 25th anniversary and while not occupying actual minutes of sewing time, does preoccupy me. Where shall we go first!?

Thursday, June 07, 2007

Working on the patterned skirt

I decided to get the other skirt finished before I continued on the blue jacket, partly because I wanted to be able to wear a new skirt and partly because someone made a comment on an old Flickr photo about under-stitching and I thought I could show a little of that this time.
patterned skirt
Here is the skirt facing, sewed on, trimmed and ironed with the seam allowance pressed toward the facing.
patterned skirt
Here I am, sewing the trimmed seam allowance to the facing by under-stitching. There's a bit of confusion in this photo because I folded back the first part that I sewed, so you could see the underside and the tops side all in one photo. Unfortunately, it looks like I've sewed the two parts together because I put them so close together in the photo.
patterned skirt
However, here is an extreme close-up of the finished facing, inside and out, with the under-stitching showing.
patterned skirt
After that, I needed to fold under the ends of the facing and then fold the whole facing to the inside of the skirt and tack it down, near the zipper and at each of the other three seams. A good press and...
patterned skirt
... the skirt is done! I hung it on top of the blue skirt I finished yesterday and now it's back to the jacket.

Wednesday, June 06, 2007

The Blue Jacket and Skirt

Forging ahead with the blue fabric, I have finished the incredibly easy four panel skirt.
blue skirt
It will go with everything, including of course, the green jacket.
blue jacket contrast pieces
Except for the bands (cuffs and bottom) here are the contrast pieces. I tried doing the topstitching in blue on both top and bobbin threads to see how it would look. I used the tabs as test pieces because they are small and you never really see the undersides of them. I didn't like the way it looked (as I suspected) and so I did the rest of the contrast topstitching with blue on the top and white on the bobbin.
contrast with buttonholes
I also did the buttonholes on the flaps and tabs before sewing them to the jacket. I often do this because it's just easier to put them under the buttonholer but couldn't do it with the green jacket because I had not got the buttons yet. In this photo, you can also see the way the topstitching looks on both sides.
back yoke
I am including this photo of the inside of the back yoke because of how I like to press things really flat. Even though the seam allowances get pressed up, I first press them open and then press them up. One more step but I think it makes the finish worthwhile. I tried taking a photo of the right side with one half only pressed up and the other double pressed but you couldn't see the difference in the photo. Of course, I can tell the difference in real life! Truly. :)
blue jacket
Here is the blue jacket on Rose, about half done, with one pocket flap artfully pinned up to show the contrast.

Monday, June 04, 2007

The green jacket is done

So I finished the green jacket last week and have even worn it twice and am started on the blue one but haven't blogged in ages. Sorry about it.
green jacket
It has been so long, I had to go back to the last entry to see where I left off. Here is a shot of the bottom band, about half on. I sew the blue or inside to the wrong side of the jacket body, then sew up the ends. When it is turned right-side-out, the green side of the band gets sewn to the outside or right side of the jacket using topstitching.
green jacket
Here's what it looks like when all finished. The topstitching on the outside is all done in green of course. On the inside, I used blue bobbin thread except for the first line of stitching that attaches the folded edge of the band in the first place. That line of stitching never (or rarely) falls on the blue band but instead, falls onto the body of the jacket which in this case, is green. If you go to Flickr and look closely, you will see a line of green thread and only one line of blue stitching where the band meets the body.
green jacket
I made the tabs with the underside in blue too, so you get a little hint of it at times. Having worn the jacket now, I know that the casual observer might not notice any blue at all unless I had the cuffs rolled up. But I still really like the subtlety of it.
green jacket
I had decided that I would use buttons and not snaps for this and the blue jacket but I wasn't sure what I would find when I got to the store. I lucked into these shiny slightly yellowish green buttons that work perfectly with the look. I also used blue bobbin thread wherever it was necessary and forgot to change it once when making a buttonhole on the jacket front and so had to rip out a little bit of that one.
green jacket finished
Here I am with the finished jacket. I look a little tired because I was in the grip of a nasty cold that wore me out but it's gone now and I'm on to the next jacket! And skirts!